
What, and How I Packed For My Last Bikepacking Excursion
If backpacking, mountain biking and bike touring had a three way lovechild, it would be bikepacking. This unruly, persnickety offspring of the bike touring world knows no bounds of roads, hotels or restaurants. But rather takes the trail less traveled; winding snaking singletrack through the forests and deserts, over mountains and through valleys, stopping for sleep wherever their is a tent platform and the view is lovely.
As I work my way through the Arizona National Scenic Trail section by section (read about this and all of my other quests HERE) I intend to bikepack quite a bit of this multi use trail. Bikes, for me, are my foundational adventure. Riding is like coming home. Comfy, familiar, and yet it has never lost the exhilaration for me.
Bringing the gear needed to spend a night or 5 while mountain biking is a bit of a packing adventure on its own. Unlike standard road touring, you can’t just load a bike and trailer with everything plus the kitchen sink and expect to pedal away. On the road, even on steep sections you can get away with excess baggage or a sloppy packing job to an extent. As long as you can keep pushing the pedals around you will be ok. Not so when touring on trail. The outrageously steep terrain and added challenge of maneuvering over rocks, roots, and switchbacks makes touring on dirt much much less forgiving. Too much total weight and you will have one helluva time moving your bike anywhere. But even more importantly, too much weight in the wrong places is bikepacking death.
You need to be able to control your steel pony over obstacles and not get pitched over the side of a cliff. Weight needs to be minimized and shifted to the middle of the bike as much as possible. Too much weight over your wheels drastically shifts the handling of your ride. Weight over the rear wheel makes handling on trail nearly impossible.
The last section of the AZT that I bikepacked I tried to get away with most of my gear in rear panniers. Bad move. The bike must have weighed 100lbs, all over the rear wheel. I knew better. I did it anyway. It was a bad time.
This time around I did everything I could to shave weight (including a new ultralight Big Agnes tent that was a gift from my beloved. Thanks Darlin!) and moved as much of it as I could to the center of my bike and onto my back. I had a much, much, much better time. I’m sure my kit will get dialed and fine tuned more over time, but I think I have the broad strokes down pretty well. Here is how I did it

My ride! The only thing I put on the rear rack was my sleeping bag with my Luci Light strapped to the top. I did struggle to keep Luci with her solar panel facing up. I'll need to work on that some more. There is a small bag under the seat where I store my bike tools. Then the AMAZING Rogue Panda frame bags. All of the Rogue Panda from bags are custom made right here in Flagstaff, Arizona. They fit and function perfectly. I would not waste my money on anyone else's bags. (I have no sponsorship from Rogue Panda, nor any affiliate relationship. I just love their bags and think they are the best on the market.)

An up close of the rear set up. Sleeping Bag strapped directly to the rear rack with Luci on top. My ancient Jand tool bag under the seat. This poor tool bag has sort of lost the bounce in its bungy. I will likely replace this combo with a Rogue Panda Picket Post seat bag in the near future. This would eliminate the need for the rear rack altogether, save a bit of weight and eliminate the potential for a strap to come loose and get caught in the rear wheel.

In my front top tube accessory bag I put my knife and lights. Basic Petzel Tikka headlamp for around camp and my super fabulous NightRider bike light and helmet mount in case I had to ride in the dark at any point. I cannot believe how small, effective and cheap NightRiders are these days! I remember when a basic bike light was $350, weighed 10 pounds and needed a suitcase to carry them around. These are just amazing and affordable technology.

In the rear top tube bag I kept quick to hand personal care items. Potty kits (Minus my shovel. It broke. Will have to get a new one.) hand sani, lip balm and sunscreen.

In the smaller slit pocket on the main frame bag I kept my printed AZT maps of the relevant passages (don't rely only on GPS for navigation folks. Just don't.) and the printed turn book. Maps and turn book can be downloaded in the members only area of the AZT website. If you plan on doing all or part of the AZT, or just want to support the care and maintenance of the trail, a membership is well worth the $35/year. I also had an emergency poncho. No rain of any kind was in the forecast, but its always good to have a "just in case" weather proofing item. My phone charging cord was stored in this pocket along with my phone (not pictured because it was taking the picture.) and my solar battery charger (also not pictured because on the last day I clipped it to my pack to try to charge it with the sun and it fell off. Boo!)

In the larger pocket on the frame bag I kept a dishwashing kit, my bike pump and spare tubes, my Big Agnes Inflatable Camping Pad, my Sawyer water filter and toothbrush. I cached water in advance of my ride, so I didn't end up using the filter. But I don't mess around when it comes to ensuring adequate water. So, my filter was a back up. I would have kept my toothbrush and toothpaste in my top tube bag with the other personal items but the bag was too short for my toothbrush. I will invest in a tiny travel toothbrush for the next ride.

In the top compartment of my Osprey Atmos 50 backpack I put personal medications, a first aid kit and my compass. No idea why I put the compass here and not with the maps. I will likely change that next time. I use the Osprey Atmos pack which is technically a "mens" packs. I have broad shoulders and relatively narrow hips for a woman, so this fits me better. For a women's specific fit, you will want to look at the Aura pack.
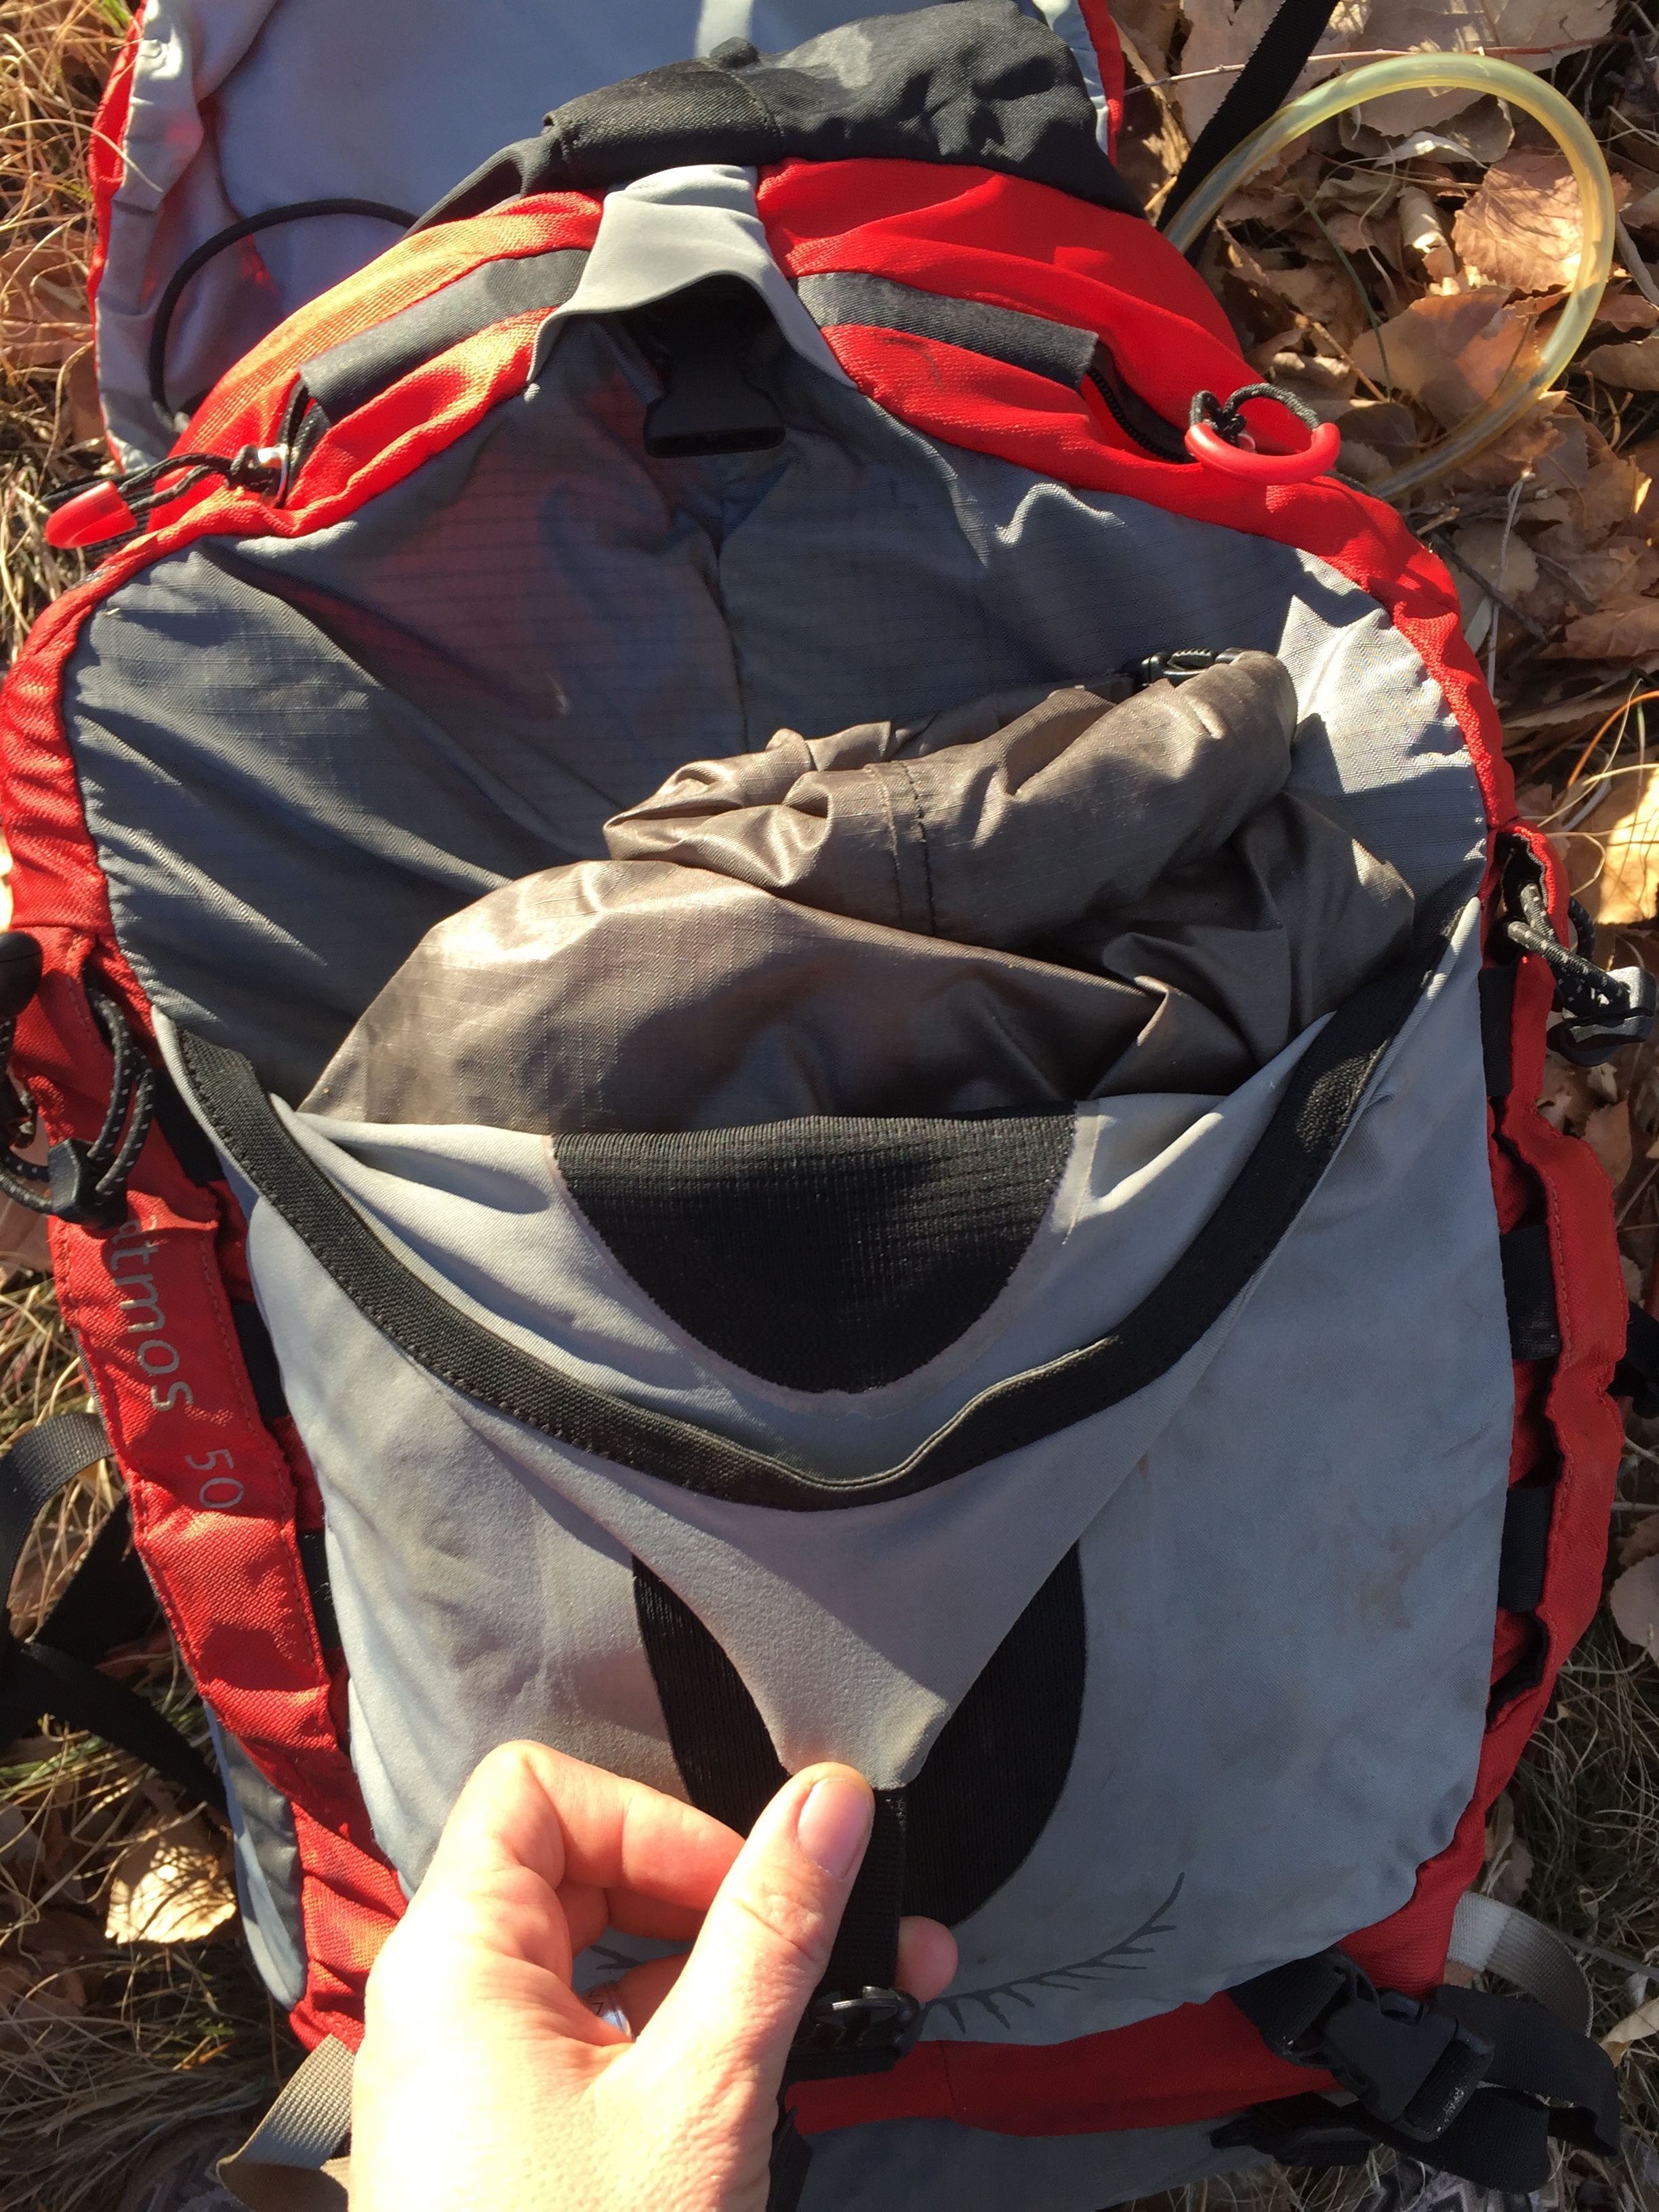
I kept my food bag in the front pouch of my pack. This made snack access easy, and kept all food items together for easy isolation at night. You don't want critters in your tent, so making sure there are no food bits in weird places is key.

In one of the front zipper pockets I stashed my bomber insulated camping cup, and my Jet Boil stove. Having used any number of stoves for backcountry travel, the Jet Boil is hands down my favorite. Compact, lightweight, super light on the fuel consumption. This pouch is also where I put the empty 4 L Platypus water pouch. I cached this ahead of time to ensure a water supply near where I planned to camp.

The other front zipper pocket held my stove fuel wrapped in an old sock (normally I carry the smaller fuel canister that fits inside the Jet Boil. But we were out. Normally this would not be taking up extra space.), my journal and favorite pen, and my Sanuk loafers. Having non-bike shoes to wear around camp is a pretty marvelous luxury, and these loafers are about the lightest weight shoes out there. They weigh about the same as my foam flip flops that I carry in the summer. Not pictured is the book I was reading. It didn't make the picture because it had already migrated inside. Clearly, I could save weight by not carrying a journal and small reading book. But, the quiet time to read and write in the evening is a big draw for me to adventure solo.

Because I have the frame bags on my bike, I can't also have bottle cages in the same place. When I had my bike built I specifically requested lots of places for bottle cages since I planned to do some touring on it. This cage is attached to the bottom of the down tube so that I could carry an extra bottle for extra fluids, mixing up electrolyte drinks, and having a container of water bedside. I was feeling paranoid about the bottle jumping out, hence the velcro strap.
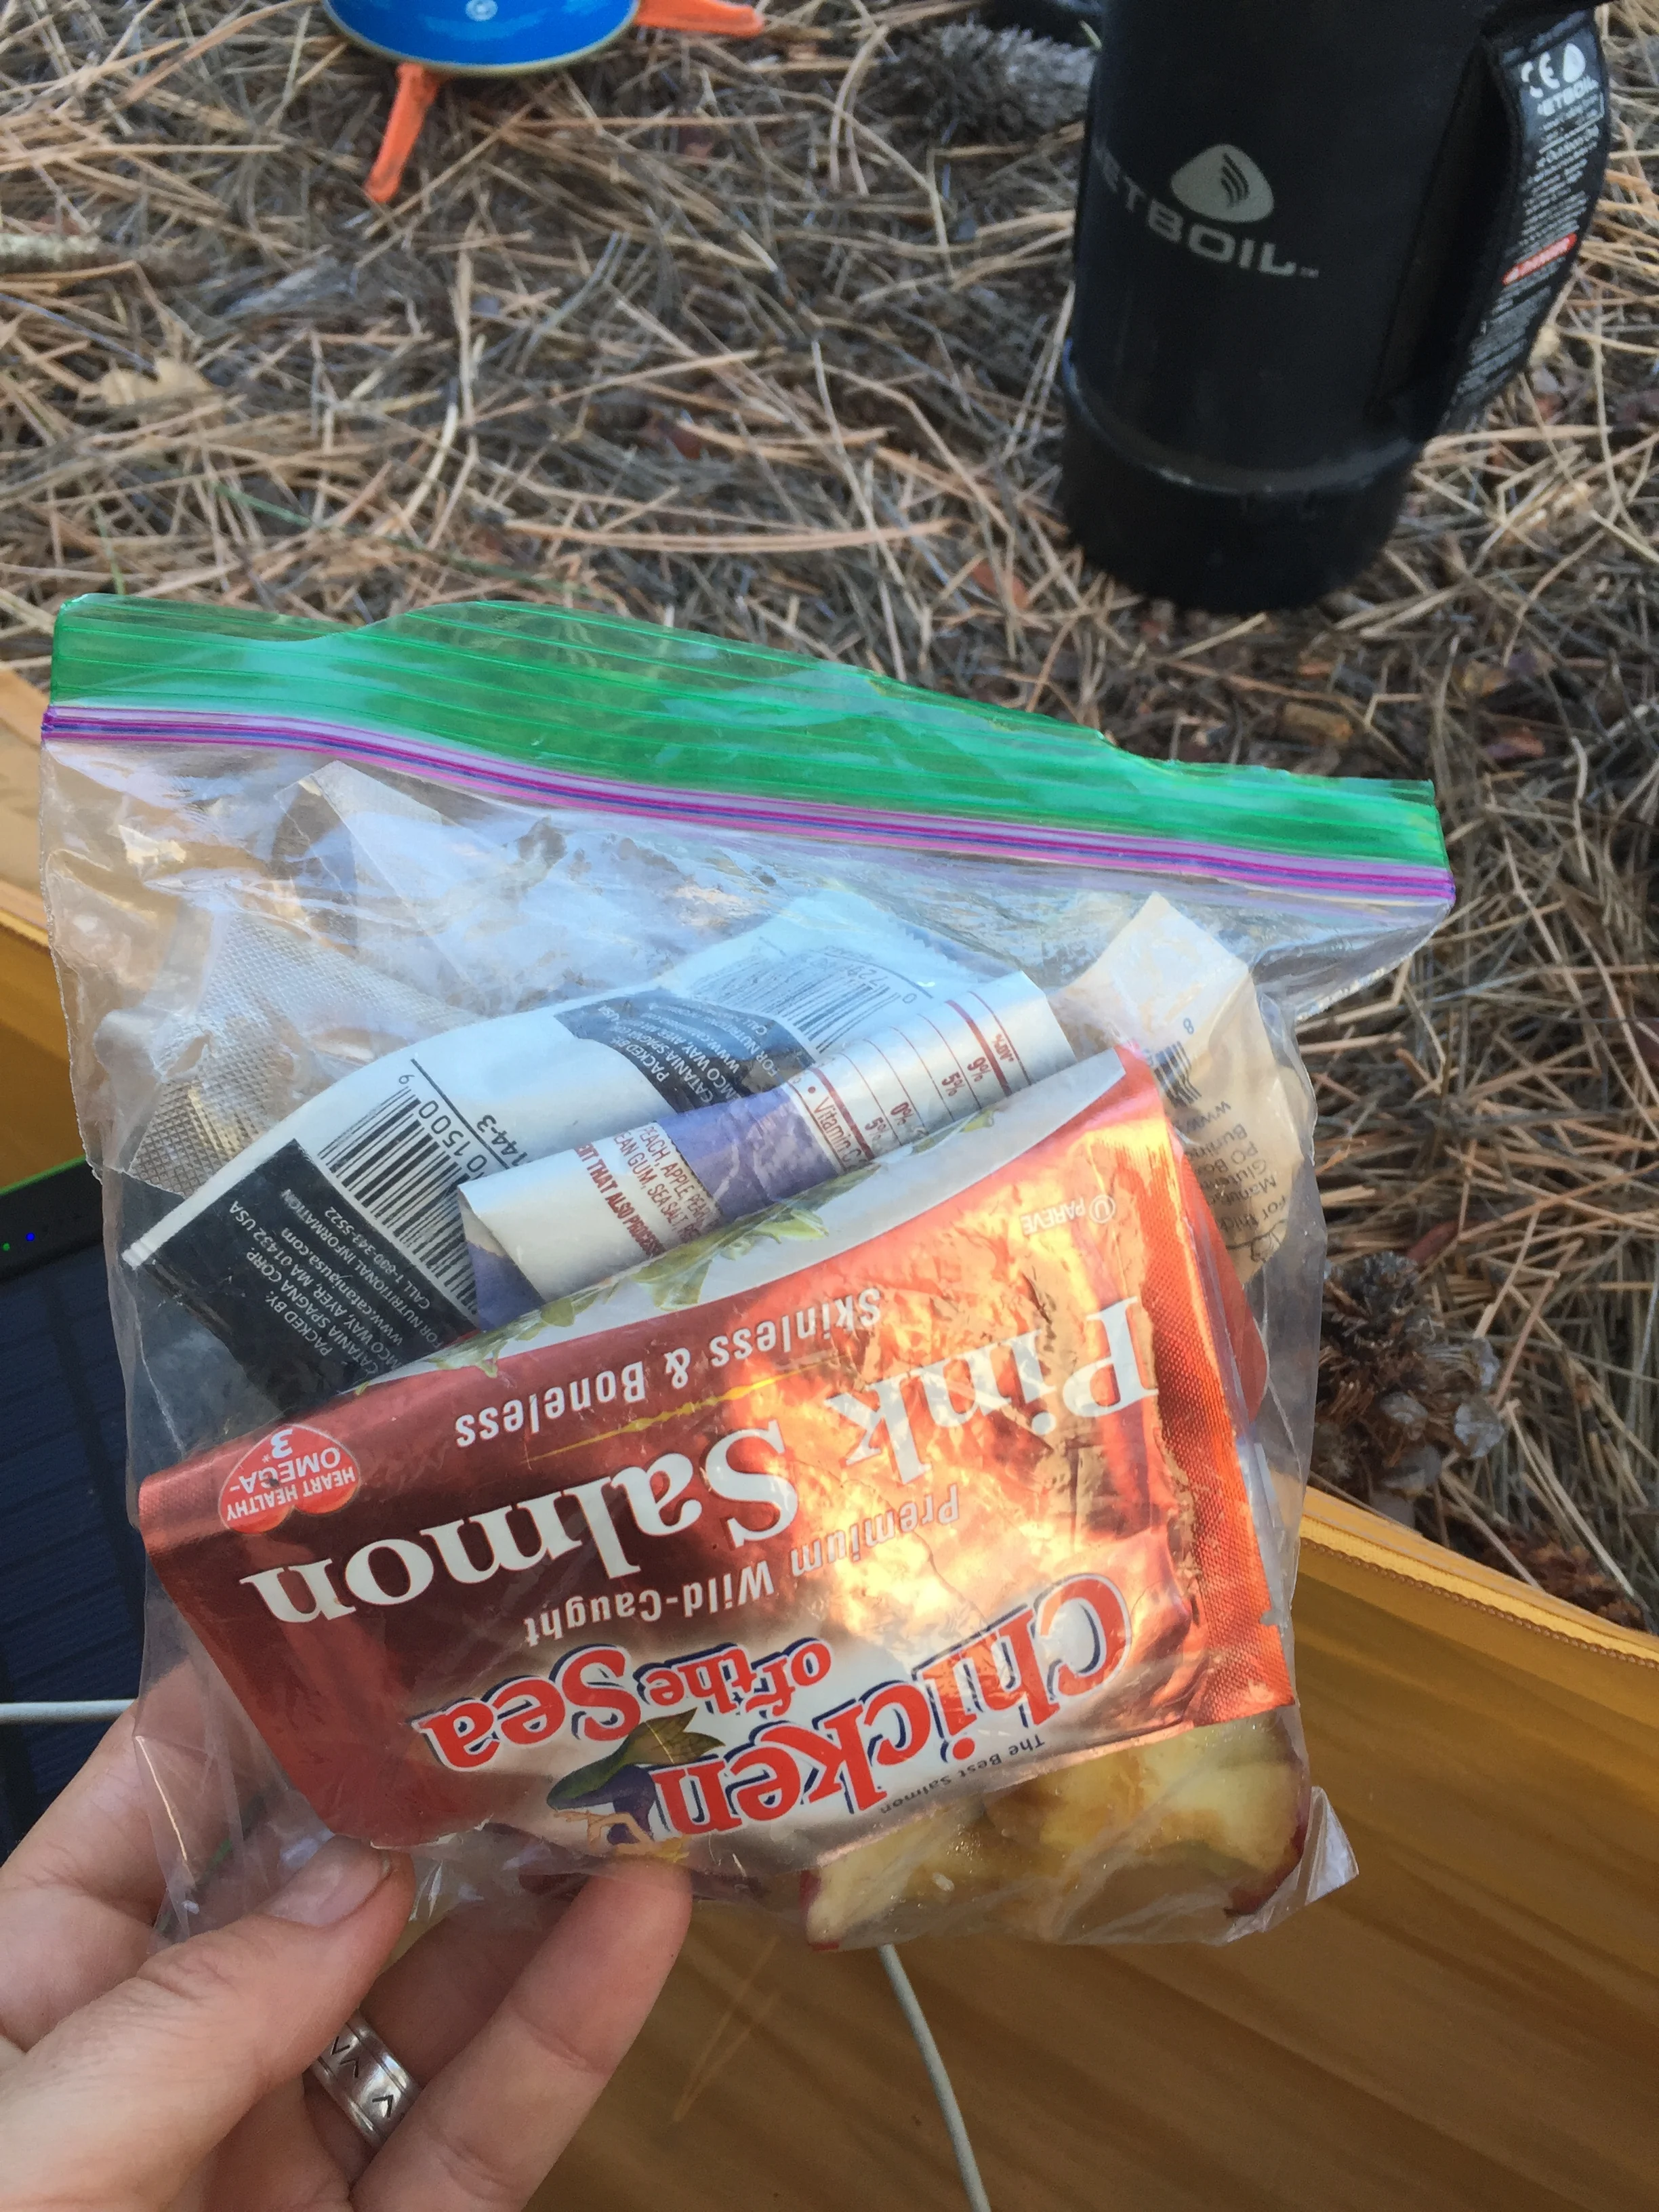
Pro tip: Carry an extra ziplock baggie or two for keeping your messy, drippy, stinky and otherwise disorganized garbage together. Practicing Leave No Trace ethics is easier when you don't have salmon juice and olive oil leaking all over your food kit. This part isn't sexy, but its important.

Finally, in the main compartment of my pack I carried my Big Agnes Fly Creek Ultralight tent, my primary water reservoir, and my extra clothes. Clothing is one of the easiest places to save space and weight in the backcountry. For this trip, I carried warm pants and long johns for sleeping and around camp, a hat and gloves, wool socks for around camp, a jacket and vest, one spare shirt, and undergarments. I wore the same pants to ride each day, and carried the spare shirt so that I wouldn't have to sleep in a shirt that was wet from sweat. The other warm layers were to pile on if and when I got cold. There was nothing that I didn't wear at some point and most things were worn repeatedly. No one is judging the freshness of your threads out there. No need to bring a whole wardrobe. (It should be noted that I chose to wear normal running tights and not a chamois for various reasons. Ladies, I would not recommend wearing a dirty chamois for obvious sanitary reasons.)

Last but not least, an up close of my solar power soaking up the sun. On the right is the previously mentioned Luci Light. On the left is the phone charger I was carrying that fell off. (Dang it!) It can be charged from a plug at home to carry extra power for your phone and is then supposed to recharge from the sun. I can attest to the fact that is will indeed charge from the wall, and hold a charge to refuel your phone. Because it fell off and got lost, I can't attest to how well the solar part works. If you want to try one yourself, it was very inexpensive. I had one similar to THIS. I'm hoping for a new one for Christmas and once I test out the solar functioning, I'll let you know. For the price though, even if the solar part isn't perfect, it is worth it for the bonus battery pack aspect.
That's it! That's how I packed for my relatively lightweight backpacking trip. Do you like to move fast through the countryside? What are your best tips and tricks for stowing your gear? Have other questions? Leave a comment below and let me know!

(This post contains affiliate links. This means that if you use the links on this post to purchase the item described, or any other item these vendors sell, a tiny percentage of your purchase will be sent to me at no extra cost to you. This helps keep the lights on here in my little corner of the internet and earns you my undying gratitude.)
If you find this blog and my writing valuable in any way, please consider starting your next Amazon purchase below. You'll get the same service, selection, prices and shipping you expect from Amazon and they will send me a small percentage of the purchase price for the referral. Many Thanks!